This chapter describes how to use the command line interface and Web-based interface to access ESP on your systems. It also describes how to configure single system management and system group management for your systems.
All ESP components are installed on your system by default when you load an operating system release or patch that contains ESP. ESP begins monitoring your system when the system is booted. You can access ESP by using the command line interface or Web-based interface.
The command line interface includes three commands: espconfig, espreport, and esplognote. The espconfig command configures ESP. The espreport command generates and displays ESP reports. The esplognote command creates logbook entries.
espconfig has the following command line options:
system# espconfig -help
Information Commands
--------------------
espconfig -help [ <prototype> ]
espconfig -spec
espconfig -version

Group Configuration
--------------------------
espconfig -add group -name <new group name>
espconfig -delete group -name <group name>
espconfig -list group
espconfig -listmembers group -name <group name>

Event Configuration
-------------------
espconfig -show evtype {-tid <type id> |-td <type desc>  }
                       [-sgmclient <client alias>]
espconfig -list evtype [-cid <class id>|-cd <class desc>]
                       [-enable|-disable]
                       [-log|-nolog]
                       [-sgmclient <client alias>]
espconfig -add  evtype -td <type desc>
                       {-cid <class id>|-cd <class desc>}
                       [-throttle <value>]
                       [-enable|-disable]
                       [-log|-nolog]
                       [-acfreq <action frequency value>]
                       [-acid <action id>|-acd <action desc>]
                       [-pri <priority>] [-fac <facility>]
                       [-appname <app. name>] [-regexp <reg. expression>]
                       [-prfid <profile id> |-prfn <profile name>]
                       [-sgmclient <client alias>|-sysid <client system id >]
espconfig -update evtype -tid <type id> [-cid <class id>|-cd <class desc>]
                       [-sgmclient <client alias>|-sysid <client system id >]
                       [-td <type desc>]
                       [-throttle <value>]
                       [-enable|-disable]
                       [-log|-nolog]
                       [-acfreq <action frequency value>]
                       [-acid <action id> | -acd <action desc>|
                        -noacid <action id> | -noacd <action desc>]
                       [-pri <priority>] [-fac <facility>]
                       [-appname <app. name>] [-regexp <reg. expression>]
                       [-prfid <profile id> | -prfn <profile name> |
                        -noprfid <profile id> | -noprfn <profile name>]
espconfig -delete evtype {-tid <type id>|-td <type desc>}
                       [-sgmclient <client alias>|-sysid <client system id >]
espconfig -subscribe evtype [-cid <class id>|-cd <class desc>]
                       [-tid <type id>|-td <type desc>]
                       [-pri <priority>] [-fac <facility>]
                       [-appname <application name>]
                       [-sgmclient <client alias>|-sysid <client system id >]
espconfig -unsubscribe evtype [-cid <class id>|-cd <class desc>]
                       [-tid <type id>|-td <type desc>]
                       [-pri <priority>] [-fac <facility>]
                       [-appname <application name>]
                       [-sgmclient <client alias>|-sysid <client system id >]
espconfig -add evclass [-cid <class id>] -cd <class desc>
                       [-sgmclient <client alias>|-sysid <client system id >]
espconfig -update evclass -cid <class id> -cd <class desc>
                       [-sgmclient <client alias>|-sysid <client system id >]
espconfig -delete evclass {-cid <class id>|-cd <class desc>}
                       [-sgmclient <client alias>|-sysid <client system id >]
espconfig -list evclass

Event Action Configuration
--------------------------
espconfig -show evaction {-acid <action id>|-acd <action desc>}
espconfig -list evaction
espconfig -add  evaction -acd <action desc> -act <action string>
                       [-enable|-disable]
                       [-user <name>]
                       [-tout <timeout value>]
espconfig -update evaction {-acd  <action desc> | -acid <action id>}
                       [-act <action string>]
                       [-enable|-disable]
                       [-user <name>]
                       [-tout <timeout value>]

Exporting and Importing Environment
-----------------------------------
espconfig -add|-load|-merge   eventprofile <profile name>+|allprofiles
                 [-defaults] [-dontsubscribe]
                 [-sgmclient <client alias> | -sysid <system Id>]
espconfig -drop|-unload    eventprofile <profile name>+|allprofiles
                 [-sgmclient <client alias> | -sysid <system Id>]
espconfig -save|-refresh    eventprofile [-defaults] <profile name>+|allprofiles
                 [-sgmclient <client alias> | -sysid <system Id>]
espconfig -list    eventprofile
                 [-sgmclient <client alias> | -sysid <system Id>]
espconfig -showevents    eventprofile <profile name>+
                 [-sgmclient <client alias> | -sysid <system Id>]
espconfig -save    espenv [global][ipaddr][user][site|customer_profile][all] [-to <file name>]
espconfig -load    espenv [-sysid <client system id >]
                [-chk <check definition file name>]
                -from <data definition file name>

IP Address Configuration
------------------------
espconfig -enable  ipaddr <IP address> ... <IP address>
espconfig -disable ipaddr <IP address> ... <IP address>
espconfig -delete  ipaddr <IP address> ... <IP address>
espconfig -list    ipaddr <IP address> ... <IP address> [-enabled|-disabled]

User and User Permission Configuration
--------------------------------------
espconfig -add     user  -name <user name> [-p <password>]
espconfig -delete  user  -name <user name> [-p <password>]
espconfig -update  user  -name <user name> [-p <new password>]
espconfig -list    user [-name <user name>]
espconfig -createadmin
espconfig -add     permdesc  -perm <permission name> -desc <permission description>
espconfig -delete  permdesc  -perm <permission name>
espconfig -list    permdesc  [-perm <permission name> .. <permission name>]
espconfig -add     userperm  [-name <user name>] -perm <permission name>
espconfig -delete  userperm  [-name <user name>][-perm <permission name>]
espconfig -list    userperm  [-name <user name>][-perm <permission name>]

ESP Archive Management
----------------------
espconfig -list    archive  [<archive name> .. <archive name>]
espconfig -drop    archive  <archive name>

ESP Customer Profile Configuration
----------------------------------
espconfig -create  customer_profile
              -fname <first name>
              -lname <last name>
              -phone <phone number>
              -email <email address>
              [-street1 <street address (line 1)>]
              [-street2 <street address (line 2)>]
              [-street3 <street address (line 3)>]
              [-city <city name>]
              [-state <state or province>]
              [-post <postal/zip code>]
              -country <country>
              [-site_id <site id>]
              [-host <host name>|-alias <client alias>|-sysid <system id>]
espconfig -update  customer_profile
              [-fname <first name>]
              [-lname <last name>]
              [-phone <phone number>]
              [-email <email address>]
              [-street1 <street address (line 1)>]
              [-street2 <street address (line 2)>]
              [-street3 <street address (line 3)>]
              [-city <city name>]
              [-state <state or province>]
              [-post <postal/zip code>]
              [-country <country>]
              [-site_id <site id>]
              [-host <host name>|-alias <client alias>|-sysid <system id>]
espconfig -show    customer_profile
              [-host <host name>|-alias <client alias>|-sysid <system id>]

Global Configuration
--------------------
espconfig -enable  call_logging [-text|-comp_encoded]
                       [-sgmclient <client alias> |-sysid <system id>]
espconfig -enable  {event_registration
                   |event_throttling
                   |event_actions
                   |shutdown_reason}
                   [-sgmclient <client alias> |-sysid <system id>]
espconfig -enable  mail -from <email address>
                   [-email1 <email address>]
                   [-email2 <email address>]
espconfig -disable {call_logging
                   |event_registration
                   |event_throttling
                   |event_actions
                   |shutdown_reason}
                   [-sgmclient <client alias> |-sysid <system id>]
espconfig -show {call_logging
                   |event_registration
                   |event_throttling
                   |event_actions
                   |shutdown_reason}
                   [-sgmclient <client alias> |-sysid <system id>]
espconfig -show mail
espconfig -flushdb [-sysid <system id>|-host <host name>]
                   [config|all]
espconfig -reconstructdb

Performance and System Monitoring  Configuration
------------------------------------------------
espconfig -on performance
          -off performance
          -list performance [-status|-enable|-disable]
          -enable performance -pd {all|<pmie rule description>}
          -disable performance -pd {all|<pmie rule description}>
espconfig monitor -list     <service name>
          monitor -show     <service name>  [-sgmclient <client alias>]
          monitor -enable   <service name>  [-sgmclient <client alias> ]
          monitor -disable  <service name>  [-sgmclient <client alias> ]

SGM Related Commands
--------------------
espconfig -show systems
espconfig -show sgmclients
espconfig -show sgmservers
espconfig -show system
             -host <host name>|-sgmclient <client alias>|-sysid <system id>
espconfig -set system -host <host name>|-sysid <system id>
                         [-alias <new alias>]
                [-group <group name> | -gid <group id> ]
espconfig -setnode system -sgmnode|-fullnode
espconfig -check system -sgmlicense|-update
espconfig -add  sgmclient -alias <client alias> -host <client hostname>
             [-path <client reach path>]
             [-group <group descr.>|-gid <group id>]
             [-v2|-v3] [-p <password>]
espconfig -subscribe  sgmclient
             -host <host name>|-alias <client alias>|-sysid <system id>
             [-loadprofiles] [-refreshprofiles] [-lightnode|-fullnode] ] [-force]
espconfig -unsubscribe  sgmclient
             -host <host name>|-alias <client alias>|-sysid <system id>
             [-force]
espconfig -update  sgmclient
             -host <host name>|-alias <client alias>|-sysid <system id>
              [-p <password>] [-path <new path>] [-lightnode|-fullnode]
espconfig -delete  sgmclient
             -host <host name>|-alias <client alias>|-sysid <system id>
espconfig ping
             -sgmclient <client alias>|-sysid <system id>|-path <reach path>
             [-espver]
espconfig -add sgmserver -host <SGM host name> -p <communication password>
espconfig -update sgmkey -host <host name> -p <comm. password> [-pid <key ID>]
|
Refer to Chapter 3, “Administering ESP,” Chapter 4, “Setting Up the ESP Environment,” and Chapter 5, “Configuring ESP,” for more information about using the espconfig command.
espreport has the following command line options:
system# espreport -help
Information Commands
--------------------
espreport -help [ <prototype> ]
espreport -spec
espreport -version

Report Commands
--------------------
espreport availability [-sysid <system id>|-host <host name>]
                       [-from mm/dd/yyyy] [-to mm/dd/yyyy]
espreport action_taken [-sysid <system id>|-host <host name>]
                       [-from mm/dd/yyyy] [-to mm/dd/yyyy]
espreport events       [-sysid <system id>|-host <host name>]
                       [-from mm/dd/yyyy] [-to mm/dd/yyyy]
                       [-tid <type id>  |-td <type desc>]
                       [-cid <class id> |-cd <class desc>]
espreport hwchanges    [-sysid <system id>|-host <host name>]
                       [-from mm/dd/yyyy] [-to mm/dd/yyyy]
espreport swchanges    [-sysid <system id>|-host <host name>]
                       [-from mm/dd/yyyy] [-to mm/dd/yyyy]
espreport logbook      [-sysid <system id>|-host <host name>]
                       [-from mm/dd/yyyy] [-to mm/dd/yyyy]
espreport summary      [-sysid <system id>|-host <host name>]
                       [-from mm/dd/yyyy] [-to mm/dd/yyyy]
espreport sysinfo      [-sysid <system id>|-host <host name>]
                       [all]
|
Refer to Chapter 6, “Viewing Reports,” for more information about using the espreport command.
esplognote does not have any command line options:
system# esplognote
|
Refer to Chapter 7, “Using the ESP Logbook,” for more information about using the esplognote command.
The Web-based interface provides a graphical interface that you can use to access ESP. You can use the following methods to access the Web-based interface:
Opening a URL in a Web browser
Using the Embedded_Support_Partner icon
Entering the launchESPartner command
| Note: The Embedded_Support_Partner icon and launchESPartner command are available only for the IRIX OS. |
Table 2-1 lists error messages that might appear when you attempt to start the Web-based interface. It also lists the cause of each message and the actions you should perform to correct the problems that caused the error messages.
Table 2-1. ESP Startup Error Messages
Error Message | Cause | Solution |
|---|---|---|
There was no response. The server could be down or is not responding. | The ESP Web server is not running on the system or the system is down. | Verify that the system is running. Reboot
the system, if necessary. |
Forbidden Request | Your system does not have permission to access the ESP Web server. | Add your system to the “allow access” list or remove it from the “restrict access” list. (Refer to “Setting Up the Network Permissions”.) |
Forbidden Request | Reverse DNS lookup failed because ESP
was not able to verify that your system IP
address and hostname matched. | If the DNS server on the system is not
working correctly, perform the following
actions to disable reverse DNS lookup: |
Authorization failed. Retry? | The username and password that you entered are not valid. | Enter a valid username and password. |
Forbidden Request | You did not enter a valid
username/password combination
within four attempts. | Wait for two minutes and log in with a valid username/password combination. |
You can access the Web-based interface via one of the following URLs:
http://localhost:5554
http://<systemname>:5554
Tips: If the system that you want to use is a server without graphics capability, you can:
Log into the server system from another networked system that has graphics capability. Then, set the DISPLAY variable on the server to a display on the remote system and start a Web browser application on the server. Open the http://localhost:5554 URL in the Web browser window that is displayed on the remote system.
Open the http://<server_system_name>:5554 URL from a Web browser application running on a remote system that has graphics capability. (If you use this option, you must use the espconfig -enable <ipaddr> command to enable network access for the remote system before you open the URL.)
Perform the following procedure to access ESP by opening a URL in a Web browser:
If this is the first time that you are using ESP on the system, do the following:
Log into the system as root and enter espconfig -createadmin to create the default user account (administrator).
Enter espconfig -enable ipaddr 127.0.0.0 and espconfig -enable ipaddr 127.0.0.1 to enable access to ESP from the local system.
Open the appropriate URL (http://locahost:5554 or http://<systemname>:5554) in a Web browser.
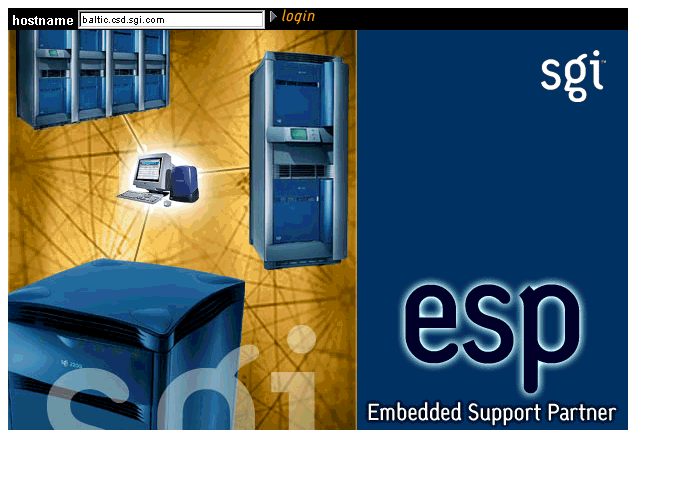
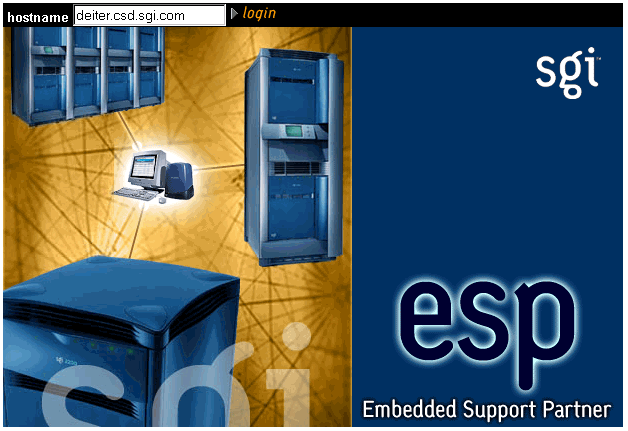
The Web browser displays the ESP opening page. (Refer to Figure 2-1.)
Specify the system that you want to access:
To connect to the local system, click on the login button.
To connect to a remote system, enter the system name or IP address in the hostname box, and click on the login button.6
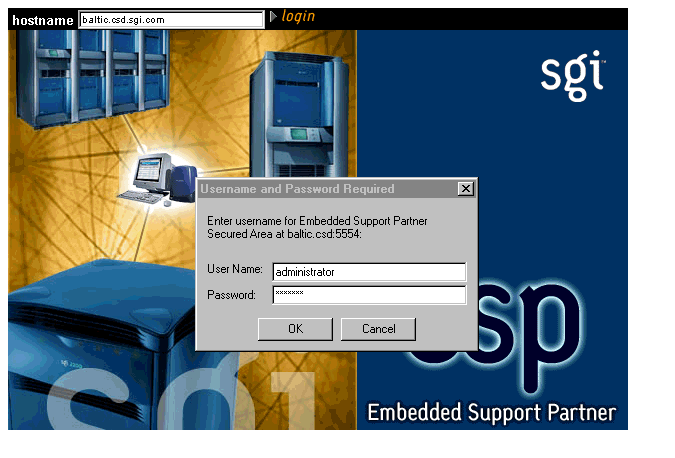
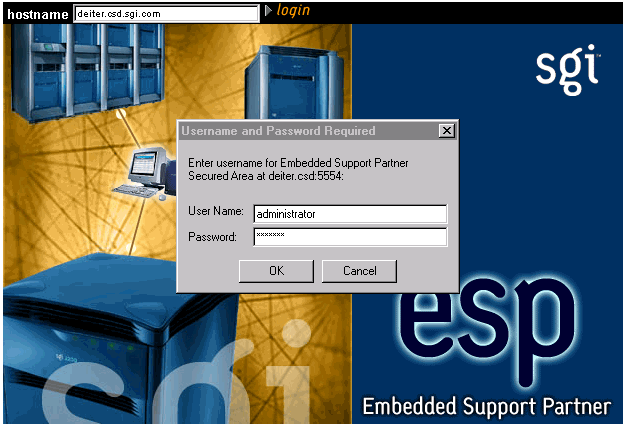
Enter a username and password. (Refer to Figure 2-2.)
The default username is administrator; the default password is partner.
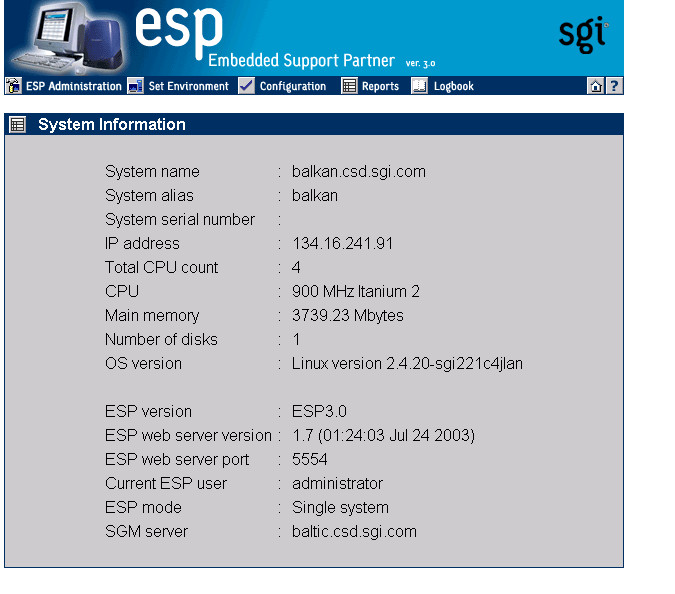
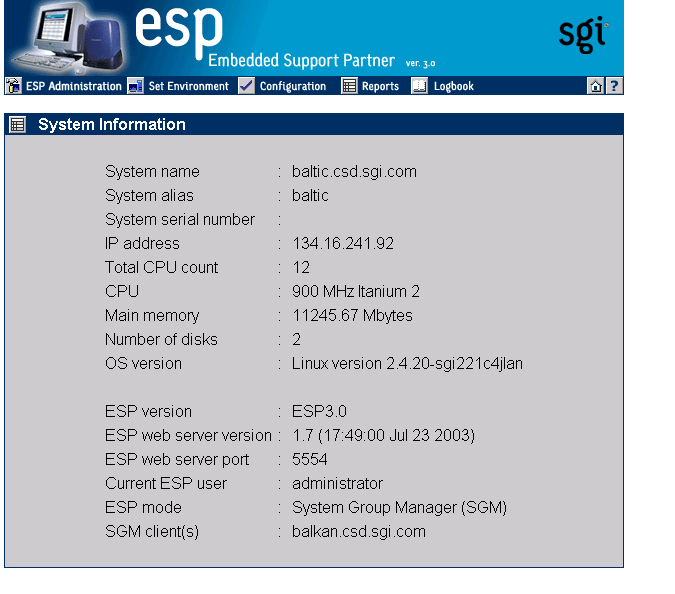
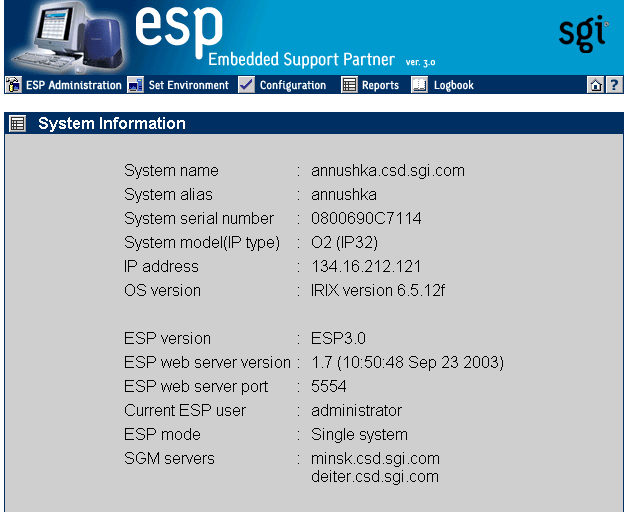
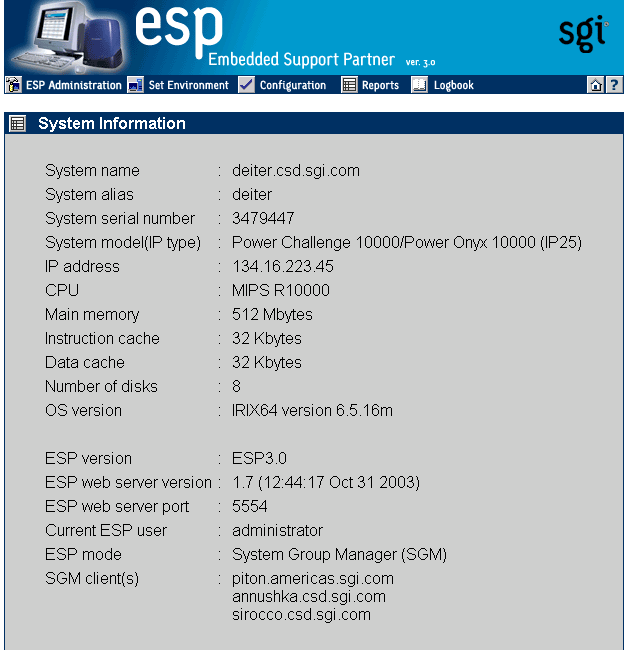
The ESP main page appears. (Figure 2-3 shows the main page in single system manager mode. Figure 2-4 shows the main page in system group manager mode.) The main page shows the current system and ESP configuration information and provides buttons that link to the main ESP functions.
Perform the following procedure to use the Embedded_Support_Partner icon to start the ESP Web-based graphical interface:
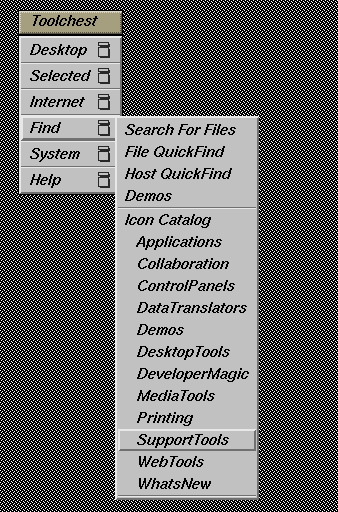
Choose Find -> Support Tools in the Toolchest menu. (Refer to Figure 2-5.)
The Icon Catalog application opens to the SupportTools category. (Refer to Figure 2-6.)
Double-click on the Embedded_Support_Partner icon.
Netscape displays the ESP opening page. (Refer to Figure 2-7.)
Specify the system that you want to access:
To connect to the local system, click on the login button.
To connect to a remote system, enter the system name or IP address in the hostname box, and click on the login button.
Enter a username and password. (Refer to Figure 2-2.)
The default username is administrator; the default password is partner.

Note: Before you use ESP the first time, enter espconfig -createadmin to create the default user account (administrator).
The ESP main page appears. (Figure 2-3 shows the main page in single system manager mode. Figure 2-4 shows the main page in system group manager mode.) The main page shows the current system and ESP configuration information and provides buttons that link to the main ESP functions.
Perform the following procedure to use the launchESPartner command to start the ESP Web-based graphical interface:
Enter the launchESPartner command.
Netscape displays the ESP opening page. (Refer to Figure 2-11.)
Specify the system that you want to access:
To connect to the local host, click on the login button.
To connect to a remote system, enter the system name or IP address in the hostname box, and click on the login button.
Enter a username and password.
The default username is administrator; the default password is partner.

Note: Before you use ESP the first time, enter espconfig -createadmin to create the default user account (administrator).
The ESP main page appears. (Figure 2-13 shows the main page in single system manager mode. Figure 2-14 shows the main page in system group manager mode.) The main page shows the current system and ESP configuration information and provides buttons that link to the main ESP functions.
Perform the following procedure the first time that you use single system manager mode to configure it:
Log into the system as root and enter espconfig -createadmin to create the default user account (administrator).
Enter espconfig -enable ipaddr 127.0.0.0 and espconfig -enable ipaddr 127.0.0.1 to enable access to the ESP from the local system.
Open one of the following URLs in a Web browser:
http://localhost:5554
http://<systemname>:5554
(Refer to “Using the Web-based Interface”.)
Change the default password to prevent unauthorized access to your system. (Refer to “Updating a Password”.)
The default user name is administrator.
The default password is partner.
Set up any user accounts and permissions that you want on your system. (Refer to “Setting Up the User Permissions”.)
Set up the access lists to allow systems to connect to the Configurable Web Server that ESP uses. By default, the Configurable Web Server is configured to refuse connections from all other IP addresses. (Refer to “Setting Up the Network Permissions”.)
If the system is running the Linux OS and ESP does not detect the system serial number, enter the system serial number. (Refer to “Setting Up the System Serial Number (ESP for the Linux OS Only)”.)
Enter the customer profile information. (Refer to “Setting Up the Customer Profile”.)
Set up the global configuration parameters. (Refer to “Setting Up the Global Configuration Parameters”.)
Modify and/or add actions. (Refer to “Configuring Actions”.)
Modify and/or add events. (Refer to “Configuring Events”.)
All ESP components necessary for group management are installed on your system by default; however, you need a nodelocked license to enable the system group management (SGM) functionality. You must configure a system to use system group manager (SGM) mode to use the group management functions in ESP.
If you want one system to register events from other systems in a group and perform actions for those events, you must subscribe to those events on the remote systems. When the ESP software on a remote system registers subscribed events, it logs them in its database (if it is a full node; light nodes do not maintain a database), performs any actions assigned to the events, and then forwards the events to the ESP software on the group manager system. Then, the ESP software on the group manager system registers the events, logs the events in its database, and performs any actions assigned to the events. This process creates a central repository of data on the group manager system, which enables you to access information about all of the systems in the group from a single interface.
Be aware of the following requirements as you configure group management:
Although you can subscribe to any events that are recognized on group member systems, the systems forward only the events that have event registration enabled. (Globally disabling event registration on a group member system disables event forwarding for all events on that system. Disabling an individual event registration on a group member prevents the group member system from forwarding that event to the group manager system.)
Event forwarding is an internal ESP action, so you must enable ESP actions on group member systems to forward events to the group manager system.
On a group manager system, ESP stores event settings on a per-host basis. There are separate sets of events for each member of the group. Disabling global or individual event registration on the group manager does not propagate to the group members systems: if a group member attempts to deliver an event that is disabled on the group manager, the event is delivered to the group manager and then the event is discarded. If you no longer need an event from a member system, you should unsubscribe the event rather than disable it on the group manager system. This reduces the overhead caused by unnecessary event delivery.
Perform the following procedure to configure group management:
Select the group of systems that you want to monitor. (These systems are called the “group members” or “SGM clients.”)
Each system in a group can be monitored by more then one group manager. Each group manager has an independent set of events that it monitors.
An ESP 3.0 SGM server can have ESP 3.0 and/or ESP 2.0 clients. ESP 3.0 clients can run the IRIX or Linux OS. ESP 2.0 clients can run the IRIX OS.
Select the system that you want to be the group manager. (This system is called the “group manager” or “SGM server.”)
The group manager system can also be a group member for another group manager. In that case, the other group manager treats the system as a single system.
Configure the group manager system in SGM mode. (Refer to “Setting Up the System Parameters (Single System Manager Mode Only)”.)
Configure ESP on each client system. You can configure each client as a single system manager or a system group manager and as a full node or a light node.
Add the SGM clients on the SGM server. (Refer to “Adding a New SGM Client”.)

Note: For greater security, configure an authentication password on the SGM server and clients. You must configure the password on an SGM client first (refer to “Adding a Password for a New Server”) and then on the SGM server (refer to“Adding a New SGM Client” and “Updating the System or a Client”). Subscribe to the events that you want to receive from the SGM Clients. (Refer to “Subscribing Events from SGM Clients”.)
