This chapter describes how to administer ESP on your system. ESP administration includes the following components:
Customer profile
Network permissions
User permissions
Database archives
You must set up the administration components when you first configure ESP on a system. After that, modify specific parameters as needed (for example, add or delete users).
Customer profiles provide contact information for a system/site. If the service contract for your site includes automatic call logging, ESP sends the name, telephone number, and e-mail address of the contact person to the call logging tool at SGI.
Perform the following procedure to use the Web-based interface to set up the customer profile for a system:
Click on the ESP Administration button.

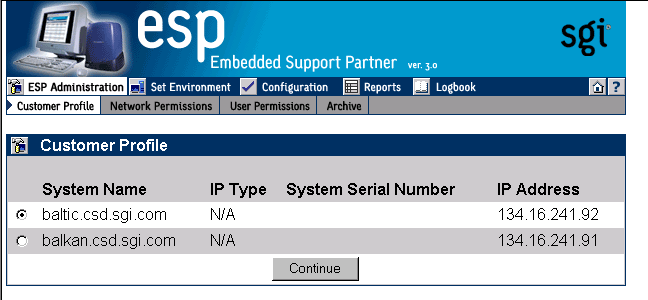
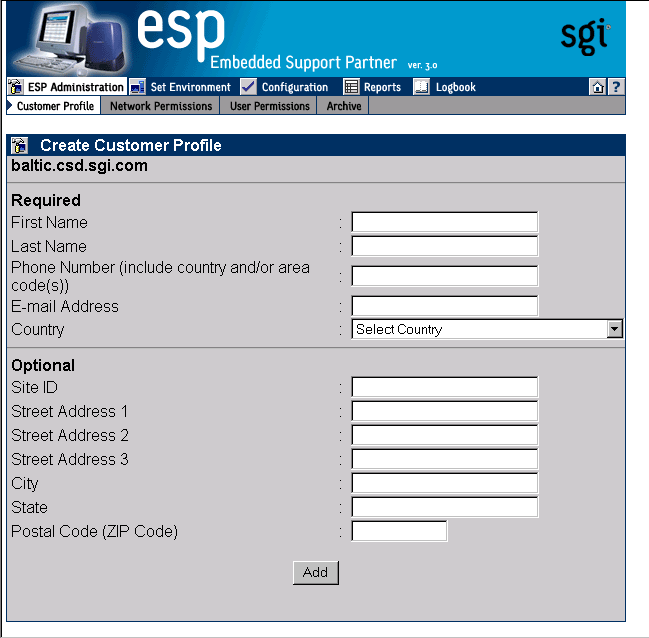
Note: If the system is an SGM server, choose the system for which you want to set up the customer profile and click on the Continue button. (Refer to Figure 3-1.) The interface displays the Create Customer Profile window. (Refer to Figure 3-2.)
Update the customer profile parameters. (Table 3-1 describes the parameters.)
Table 3-1. Customer Profile Parameters
Parameter
Description
Required Parameters [a]
First Name
First name of the site contact person
Last Name
Last name of the site contact person
Phone Number
Phone number of the site contact person (include only numbers and dashes; for example: 1-715-123-4567)
E-mail Address
E-mail address of the site contact person (ESP sends a copy of any automated e-mail messages to this address)
Country
Country where the site is located
Optional Parameters [b]
Site ID
Identification number for the site
Street Address 1
Street Address 2
Street Address 3Street address for the site
City
City where the site is located
State
State where the site is located
Postal Code (Zip Code)
Postal code or zip code of the site location
[a] Information in the required fields is necessary to enable automatic call logging. If this information is not pro vided, automatic call logging is disabled.
[b] Although these fields are optional, it is recommended that you provide this information
Click on the Add button.
You can use the espconfig command to view, set up, or modify the customer profile from the command line interface:
Use the following command syntax to view the current customer profile:
/usr/sbin/espconfig -show customer_profile
 [-host <host name>|-alias <client alias>|-sysid <systemid>]
Use the following command syntax to set up the initial customer profile:
/usr/sbin/espconfig -create customer_profile
  [-fname   <first name>]
  [-lname   <last name>]
  [-phone   <phone>]
  [-email   <email>]
  [-street1 <street address line1>]
  [-street2 <street address line2>]
  [-street3 <street address line3>]
  [-city    <city>]
  [-state   <state/province>]
  [-post    <postal code>]
  [-country <country>]
  [-site_id <site id>]
 [-host <host name>|-alias <client alias>|-sysid <systemid>]
Use the following command syntax to update an existing customer profile:
/usr/sbin/espconfig -update customer_profile
  [-fname   <first name>]
  [-lname   <last name>]
  [-phone   <phone>]
  [-email   <email>]
  [-street1 <street address line1>]
  [-street2 <street address line2>]
  [-street3 <street address line3>]
  [-city    <city>]
  [-state   <state/province>]
  [-post    <postal code>]
  [-country <country>]
  [-site_id <site id>]
 [-host <host name>|-alias <client alias>|-sysid <systemid>]
Network permissions enable you to specify which systems can access the Web server that ESP uses. These permissions provide a layer of security to prevent unauthorized systems from accessing ESP data from your systems.
If you want to restrict access to ESP, you must set up a “restrict access” list and an “allow access” list. (If you do not set up a “restrict access” list, all IP addresses can connect to ESP regardless of the “allow access” list settings because the default configuration allows connections from all IP addresses if no “restrict access” list exists.)
The most secure configuration is to set the “restrict access” list to all hosts (*.*.*.*) and set the “allow access” list to the hosts that you want to have access to ESP. (For example, set the “allow access” list to 197.*.*.* and the “restrict access” list to *.*.*.* if you want only the systems that have IP addresses that begin with 197 to have access to ESP.)
| Caution: All changes that you make to the “restrict access” and “allow access” lists immediately take effect. Ensure that you do not set up access lists that prevent your administration system from connecting to ESP. |
By default, the “restrict access” list is set to *.*.*.* to restrict all hosts. You must enable access by the local host (127.0.0.0 and 127.0.0.1) before you can access the ESP Web server. To do this, enter the espconfig -enable ipaddr 127.0.0.0 and espconfig -enable ipaddr 127.0.0.1 commands before you attempt to access ESP on a system for the first time.
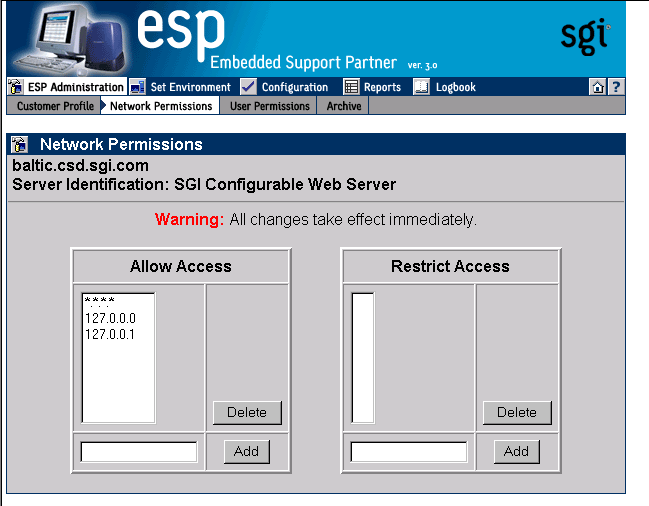
Perform the following procedure to use the Web-based interface to set up network permissions:
Click on the ESP Administration button.
Click on the Network Permissions button.
The interface displays the Network Permissions window. (Refer to Figure 3-3.)
To modify the Allow Access list:
To add an address, enter the IP address or IP address mask (using * as a wild card for one or more values in the address) in the box, and click on the Add button.
To delete an address, click on the address in the Allow Access list, and click on the Delete button.
To modify the Restrict Access list:
To add an address, enter the IP address or IP address mask (using * as a wild card for one or more values in the address) in the box, and click on the Add button.
To delete an address, click on the address in the Restrict Access list, and click on the Delete button.
You can use the espconfig command to set up the network permissions from the command line interface:
| Tip: Use an asterisk as a wild card character in any of the IP addresses that you enter for the <ip address> parameter (for example, 123.23.2.*, 123.255.*.*, and *.*.*.*). |
Use the following command syntax to enable IP addresses to access the ESP Web server:
/usr/sbin/espconfig -enable ipaddr <ip address> ... <ip address>
You must specify at least one IP address. If you specify an IP address that is already enabled, it remains enabled. If you specify an IP address that is disabled, ESP moves it from the “restrict access” list to the “allow access” list to enable it for Web server access. If you specify a new IP address, ESP adds it to the “allow access” list to enable it for access to the Web server.
Use the following command syntax to restrict IP addresses from accessing the ESP Web server:
/usr/sbin/espconfig -disable ipaddr <ip address> ...<ip address>
You must specify at least one IP address. If you specify an IP address that is disabled, it remains disabled. If you specify an address that was enabled for Web server access, ESP moves it from the “allow access” list to the “restrict access” list to prevent it from accessing the Web server. If you specify a new IP address, ESP adds it to the “restrict access” list to prevent it from accessing the Web server.
Use the following command syntax to delete IP addresses from the access lists on the system:
/usr/sbin/espconfig -delete ipaddr <ip address> ...<ip address>
You must specify at least one IP address.
Use the following command syntax to list the IP addresses that are contained in the access lists on the system and the current state of the IP addresses:
/usr/sbin/espconfig -list ipaddr <ip address>...<ip address> [-enabled | -disabled]
If you do not specify an IP address, this command lists all IP addresses in the access lists on the system. If you specify the -enabled option, this command lists only the IP addresses that are in the “allow access” list. If you specify the -disabled option, this command lists only the IP addresses that are included in the “restrict access” list.
User permissions provide an additional security layer by enabling you to create individual user accounts within ESP. Each user account can have access to different areas of ESP (for example, one account could have access only to availability reports and a second account could have access to all reports).
ESP contains one user account by default (login: administrator; password: partner). The administrator account has full access to all ESP features.
| Note: This is no direct correlation between ESP user accounts and “normal” user accounts on a system. |
You can view a list of all ESP user accounts that are currently available.
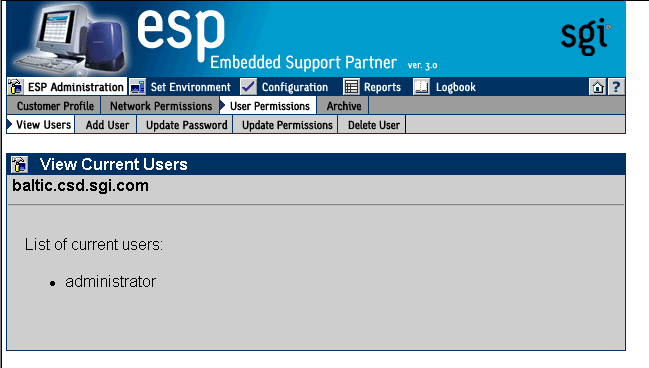
Click on the ESP Administration button.
Click on the User Permissions button.
The interface shows the list of current users. (Refer to Figure 3-4.)
Use the following syntax of the espconfig command to view a list of current users:
/usr/sbin/espconfig -list user [-name <username>] |
If you include the -name option, this command displays information about a specific user. If you do not include the -name option, this command lists all users.
Any user with the “ESP Administration and Set Environment” permission can add new users and configure access permissions for them.
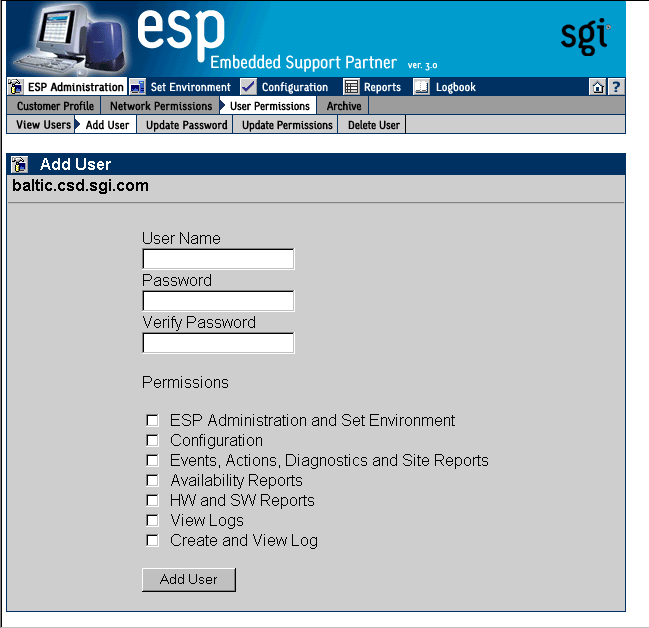
Perform the following procedure to use the Web-based interface to add a user:
Click on the ESP Administration button.
Click on the User Permissions button.
Click on the Add User button.
The interface displays the Add User window. (Refer to Figure 3-5.)
Enter the login name for the user in the User Name field.
User names have the following restrictions:
User names are case sensitive; for example, User is different than USer.
User names cannot be more than 126 characters.
User names cannot include the following characters: ? & * “ < > %
Enter the password for the user in the Password field.
Passwords have the following restrictions:
Passwords are case sensitive; for example, Password is different than PAssword.
Passwords cannot be more than 126 characters.
Passwords cannot include the following characters: ? & * “ < > % <SPACE> <Tab>
Re-enter the password for the user in the Verify Password field. (You must enter the password twice to ensure that it is entered correctly.)
Set the permissions for the user. (Table 3-2 describes the permissions.)
Table 3-2. Available User Permissions
Permission
Description
ESP Administration and Set Environment
Enables the user to perform all activities in the ESP Administration and Set Environment sections of the interface (set up customer profile, network permissions, user permissions, global configuration, paging parameters, archive settings, and SGM settings)
Configuration
Enables the user to perform all activities in the Configuration section of the interface (configure events, actions, performance monitoring, and system monitoring)
Events, Actions, Diagnostics and Site Reports
Enables the user to view all event reports, action reports, diagnostic reports, and site reports
Availability Reports
Enables the user to view availability reports
HW and SW Reports
Enables the user to view hardware inventory reports, software inventory reports, and system reports
View Logs
Enables the user to view logbook entries
Create Log
Enables the user to create logbook entries
Click on the Add User button.
Use the following syntax of the espconfig command to add a new user:
/usr/sbin/espconfig -add user -name <username> [-p <password>] |
User names have the following restrictions:
User names are case sensitive; for example, User is different than USer.
User names cannot be more than 126 characters.
User names cannot include the following characters: ? & * “ < > %
Passwords have the following restrictions:
Passwords are case sensitive; for example, Password is different than PAssword.
Passwords cannot be more than 126 characters.
Passwords cannot include the following characters: ? & * “ < > % <SPACE> <Tab>
Any user with the “ESP Administration and Set Environment” permission can update user passwords. (You must know a user's current password to update their password. If a user forgets their password, delete their current user account and create a new account with the same user name.)
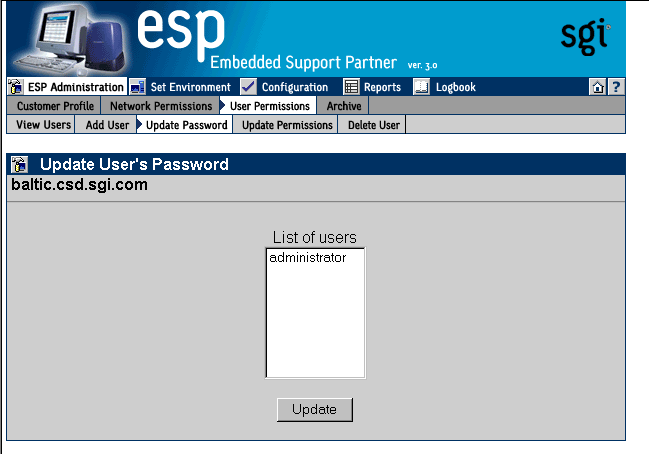
Perform the following procedure to use the Web-based interface to update a user password:
Click on the ESP Administration button.
Click on the User Permissions button.
Click on the Update Password button.
The interface displays the Update Password for User window. (Refer to Figure 3-6.)
Select the user whose password you want to update.
Click on the Update Password button.
The interface displays the Add User window. (Refer to Figure 3-5.)
Enter the old password for the selected user in the Old Password field.
Enter the new password in the New Password field.
Passwords have the following restrictions:
Passwords are case sensitive; for example, Password is different than PAssword.
Passwords cannot be more than 126 characters.
Passwords cannot include the following characters: ? & * “ < > % <SPACE> <Tab>
Re-enter the new password in the Verify Password field. (You must enter the password twice to ensure that it is entered correctly.)
Click on the Commit button.
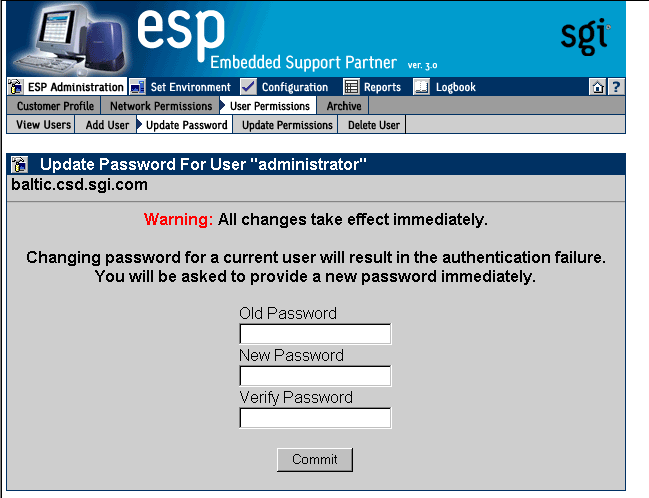
| Note: If you change the password for the account you are currently using, the interface displays an Authorization Failed message and prompts you for the new password. |
Use the following syntax of the espconfig command to update a password:
/usr/sbin/espconfig -update user -name <username> [-p <new_password>] |
Passwords have the following restrictions:
Passwords are case sensitive; for example, Password is different than PAssword.
Passwords cannot be more than 126 characters.
Passwords cannot include the following characters: ? & * “ < > % <SPACE> <Tab>
Any user with “ESP Administration and Set Environment” permission can update permissions for other users. (Updating permissions enables you to add or remove specific permissions for a user.)
| Note: If a user attempts to access a feature for which he/she does not have permission, the interface displays an Authorization Failed message and ESP does not perform the requested operation. |
| Caution: Do not change the permissions for the administrator account. The administrator account is the main ESP account and should always have full permissions. |
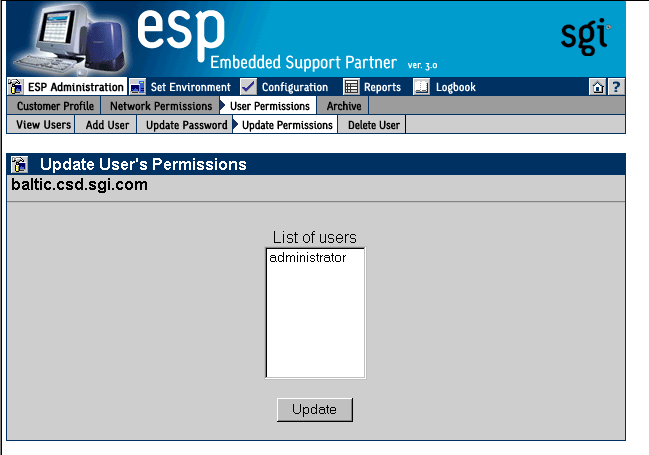
Perform the following procedure to use the Web-based interface to update permissions for a user:
Click on the ESP Administration button.
Click on the User Permissions button.
Click on the Update Permissions button.
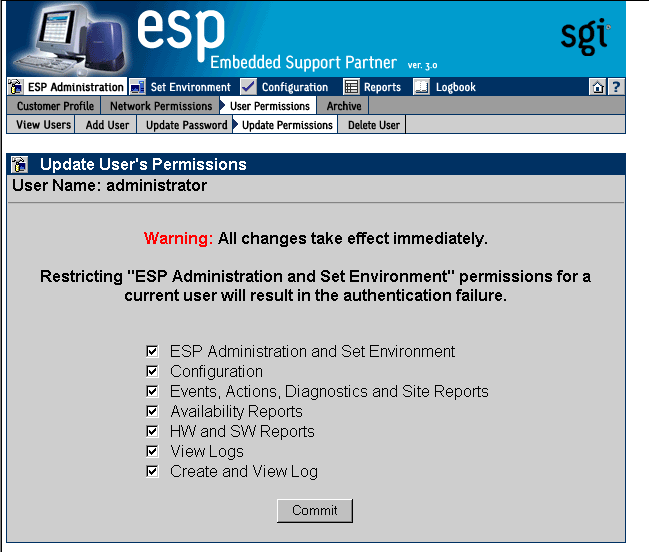
The interface displays the Update User's Permissions window. (Refer to Figure 3-8.)
Select the user whose permissions you want to update.
Click on the Update Permissions button.
The interface updates the Update User's Permissions window. (Refer to Figure 3-9.)
Select the permissions that you want the user to have. (Refer again to Table 3-2 on page 75 for descriptions of the permissions.)
Note: Restricting the “ESP Administration and Set Environment” permission for the current user causes the interface to display an Authorization Failed message because the account no longer has access to the Update Permissions command. Click on the Commit button.
You can use the espconfig command to list the available permissions on a system and to list, add, or delete user permissions:
Use the following command syntax to create the default user account and password:
/usr/sbin/espconfig -createadmin
Use the following command syntax to list the permissions that are available on a system:
/usr/sbin/espconfig -list permdesc [-perm <permission name>..<permission name>]
If you do not specify a specific permission name, this command displays all permissions that are available on the system.
Use the following command syntax to add a new type of permission to a system:
/usr/sbin/espconfig -add permdesc -perm <permission name> -desc <permission description>
Use the following command syntax to delete a specific type of permission from a system:
/usr/sbin/espconfig -delete permdesc -perm <permission name>
Use the following command syntax to list permissions for a user:
/usr/sbin/espconfig -list userperm [-name <user name>] [-perm <permission name>]
If you do not specify a user name, this command lists all users. If you do not specify a permission name, this command lists all permissions. If you do not specify a user name or permission name, this command lists all permissions for all users.
Use the following command syntax to add new permissions for a user:
/usr/sbin/espconfig -add userperm [-name <user name>] -perm <permission name>
Table 3-3 lists the settings for the <permission name> parameter.
Table 3-3. Command Line Interface User Permission Settings
Permission
Setting
ESP administration and set environment
ESPpermission:set_environment
Configuration
ESPpermission:configuration
Event registered, actions taken, diagnostic results, and site reports
ESPpermission:events_actions_diag_reports
Availability reports
ESPpermission:availability_reports
Hardware and software configuration reports
ESPpermission:hw_sw_reports
View logs
ESPpermission:logbook_view
Create log
ESPpermission:logbook
If you do not specify a user name, this command adds the permission to all users.
Use the following command syntax to delete permissions from a user:
/usr/sbin/espconfig -delete userperm [-name <user name>] [-perm <permission name>]
If you do not specify a user name, this command deletes the specified permission from all users. If you do not specify a permission name, this command deletes all permissions from the specified user. If you do not specify a permission name or user name, this command deletes all permissions from all users.
Any user with the “ESP Administration and Set Environment” permission can delete other ESP users. To ensure that security is not compromised, always delete users that no longer need access to ESP on a specific system.
| Caution: Do not delete the administrator user account. All systems should have the administrator account. |
Perform the following procedure to use the Web-based interface to delete a user:
Click on the ESP Administration button.
Click on the User Permissions button.
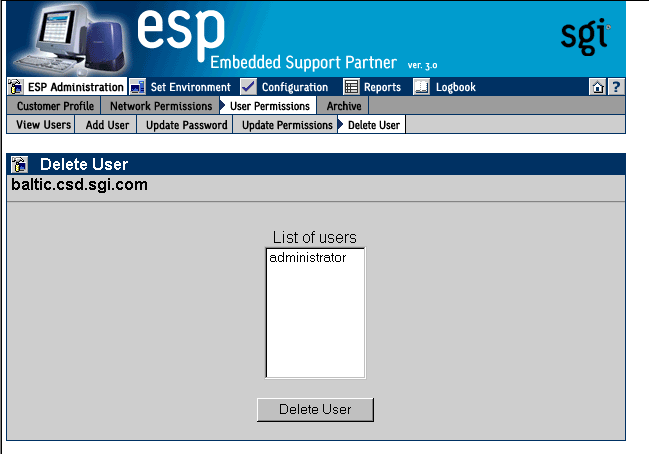
Click on the Delete User button.
The interface displays the Delete User window. (Refer to Figure 3-10.)
Select one or more user accounts to delete.
Click on the Delete User button.
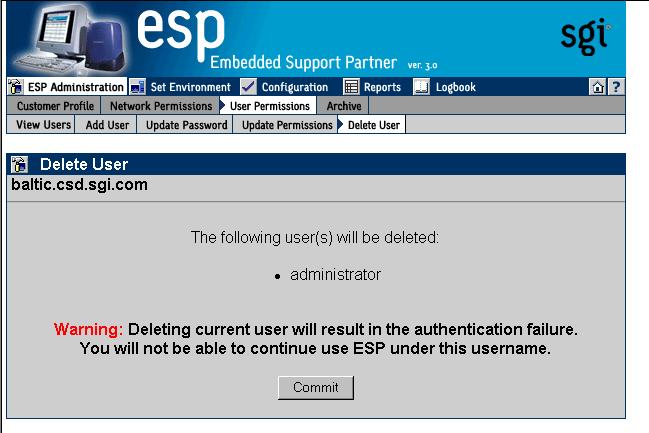
The interface updates the Delete User window. (Refer to Figure 3-11.)
Click on the Commit button.
Use the following syntax of the espconfig command to delete a user:
espconfig -delete user -name <user name> [-p <user password>] |
If you do not provide the password for the user account that you want to delete, this command prompts you for the password (but does not display the password on the screen).
ESP logs data in a database on the system as it registers events and performs actions. You can archive the current database to reduce the amount of disk space used on the system.
Use the esparchive command at a UNIX prompt to archive the current database that ESP is using on a system. The esparchive command shuts down ESP momentarily, compresses the current database to save space, opens a new database to receive data from ESP, and restarts ESP. (You must use the root account to execute the esparchive command; this command archives the current database only if it is 10 MB or larger.)
You can use the Web-based interface and command line interface to delete database archives that you no longer need.
| Warning: When you delete a database archive, the information in the database archive is permanently lost. You will not be able to view any system information that was stored in the database archive. |
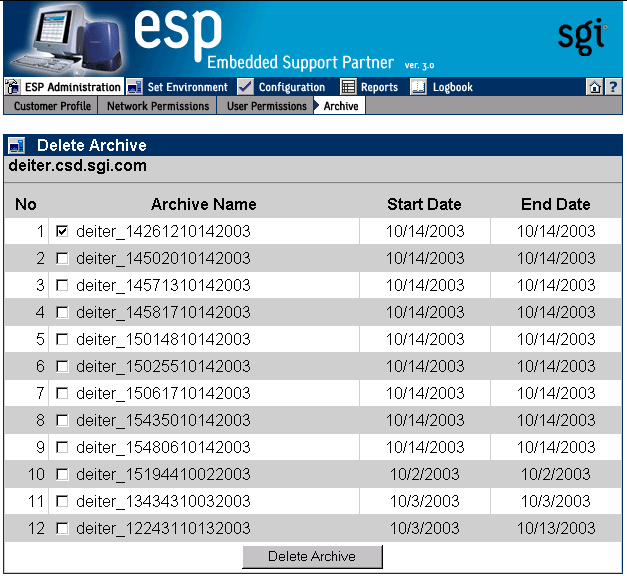
Perform the following procedure to use the Web-based interface to delete a database archive:
Click on the ESP Administration button.
Click on the Archive button.
The interface displays the Delete Archive window. (Refer to Figure 3-12.)
Click on the check box next to the name of the database archive that you want to delete.
Click on the Delete Archive button.
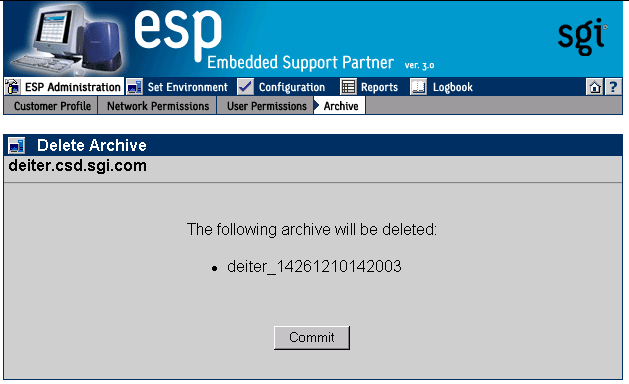
The interface displays a verification screen. (Refer to Figure 3-13.)
Click on the Commit button.
You can use the espconfig command to view information about the available database archives and to delete a specific database archive:
Use the following command syntax to view the available database archives:
/usr/sbin/espconfig -list archive [<archive name> ... <archive name>]
This command displays the name and date information for archives. If you specify one or more archive names, this command lists information about those archives. If you do not specify an archive name, this command displays information about all of the archives on the system.
Use the following command syntax to delete a database archive:
/usr/sbin/espconfig -drop archive <archive name>
The espconfig command also enables you to initialize the ESP database on your system.
| Warning: Initializing the ESP database on a system deletes all data for that system. If the system is a group manager, initializing the ESP database also deletes information about events on other systems in the group. |
Use the following command syntax to initialize the ESP database on your system to return it to the initial state:
/usr/sbin/espconfig -reconstructdb
Use the following command syntax to “clean” the ESP database tables on your system:
/usr/sbin/espconfig -flushdb [-sysid <system id>|-host <hostname>] [config | all]
Use the -sysid option to select a system by system ID. Use the -host option to select a system by hostname. If you do not specify the -sysid or -host option, this command “cleans” the database tables on the local system.
If you do not specify the config or all option, this command “cleans” the ESP data tables on the selected system. If you specify the config option, this command “cleans” only the configuration tables for the local system. If you specify the all option, this command “cleans” the configuration tables and the ESP data tables on the selected system.