The ESP software suite includes the espnotify tool, which you can use to perform the following types of notification:
Display a message on the system console
Display a message on a local or remote X Window System display
Send an e-mail message
| Note: This chapter describes how to use the espnotify command to create notifications. ESP can also automatically generate the espnotify command line from options that you select from the graphical user interface (when you use the Notification Action option in the Add Action window). The information in this chapter simply provides examples of how you can create command lines as actions. If you need to create standard notification actions, it is easiest to use the automated method. |
Use the following format of the espnotify command to display a message on the system console:
/usr/bin/espnotify -A <message> [-n <number>] |
This format of the espnotify command has the following command line options:
| -A | Specifies that the message should be displayed in the console window | |
| <message> | Specifies the message that the window should display | |
Enclose <message> in single quotes (` `) if the message contains more than one word. | ||
| -n <number> | Specifies an optional priority message, which is determined by the value that you specify for <number> | |
The <number> parameter can be a value from 1 to 7. espnotify attaches a label to the message based on the value of <number>: 1 or 2 (Critical System Error), 3 (System Error), 4 (System Warning), or 5 to 7 (System Information) |
For example, the following command displays the message This is the message to display. on the console (refer to Figure 8-1):
/usr/bin/espnotify -A `This is the message to display.' |
Use the following format of the espnotify command to display a message on a local or remote X Window System display:
/usr/bin/espnotify -c <message> [-a] [-D <display>] [-g <geometry>] [-i <icon>] -n <number>] [-t <title>] |
This format of the espnotify command has the following command line options:
| -c <message> | Specifies the message that the window should display | |
Enclose <message> in double quotes (“ “) if the message contains more than one word. | ||
| -a | Specifies that an audio file should be played | |
The /usr/bin/ssplay application plays the audio file. Audio notification cannot be performed without graphical notification. Audio notification can be performed only on the local host. | ||
| -D <display> | Specifies the display to use. (If you do not specify a display, the window is displayed on the host specified by the $DISPLAY environment variable.) | |
| -g <geometry> | Specifies an optional X Window System geometry string for the window (in the standard WIDTHxHEIGHTxXOFFxYOFF format) | |
For example, -g 120x80x50x100 specifies a window that is 120 pixels wide by 80 pixels high and is located 50 pixels from the left edge of the screen and 100 pixels from the top edge of the screen. (Refer to the x(1) man page for more information.) | ||
| -i <icon> | Specifies an optional image to display as an icon for the window | |
| -n <number> | Specifies an optional priority message, which is determined by the value that you specify for <number> | |
The <number> parameter can be a value from 1 to 7. espnotify attaches a label to the message based on the value of <number>: 1 or 2 (Critical System Error), 3 (System Error), 4 (System Warning), or 5 to 7 (System Information) | ||
| -t <title> | Specifies an optional title of the window. | |
Enclose <title> in double quotes (“ “) if the title contains more than one word. |
For example, the following command displays a window on the local host (refer to Figure 8-2):
/usr/bin/espnotify -c "This is the message to display." -D localhost:0 -t "This is the title." |
Use the following format of the espnotify command to send an e-mail message:
/usr/bin/espnotify -E <address> { -f <filename> | -m <message> } [-n <number>] [-o <options>] [-s <subject>]
|
This format of the espnotify command has the following command line options:
| -E <address> | Specifies the e-mail addresses that should receive the message | |
Enclose <address> in single quotes (` `) if the list contains more than one address. | ||
| -f <filename> | Specifies a text file to use as content for the message | |
You cannot use the -f and -m options at the same time. | ||
| -m <message> | Specifies text to use as content for the message | |
Enclose <message> in single quotes (` `) if the message contains more than one word. | ||
You cannot use the -f and -m options at the same time. | ||
| -n <number> | Specifies an optional priority message, which is determined by the value that you specify for <number> | |
The <number> parameter can be a value from 1 to 7. espnotify attaches a label to the message based on the value of <number>: 1 or 2 (Critical System Error), 3 (System Error), 4 (System Warning), or 5 to 7 (System Information) | ||
| -o <options> | Specifies processing options for the message | |
Two options are available: -o COMP (compress and uuencode the message) and -o ENCO (uuencode the message). These options are valid only if you also use the -f option. | ||
| -s <subject> | Specifies the subject of the message | |
The format of the default subject is [HOSTNAME]: <text>, where HOSTNAME is replaced with the name of the host and <text> is replaced with a priority message (for example, Critical System Error). | ||
If you use the -n and -s options, the -s option overrides the -n option. |
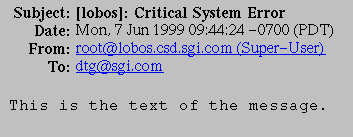
For example, the following command sends a message to dtg@sgi.com (refer to Figure 8-3):
/usr/bin/espnotify -E dtg@sgi.com -m 'This is the text of the message.' -n 1 |
Because espnotify is a command line utility, you can configure it as an ESP action. To do this, create a new action or update an existing action with a command string that uses the /usr/bin/espnotify command. This section shows an example of how to create ESP actions that use espnotify.
| Note: ESP automatically generates the proper espnotify command line when you choose the Notification option in the Add Action window. |
The first example shows how to set up an ESP action to send notification by E-mail.
Click on the Configuration button.
Click on the Actions button.
Click on the Add button.
Click on the radio button next to Other action.
Click on the Continue button.
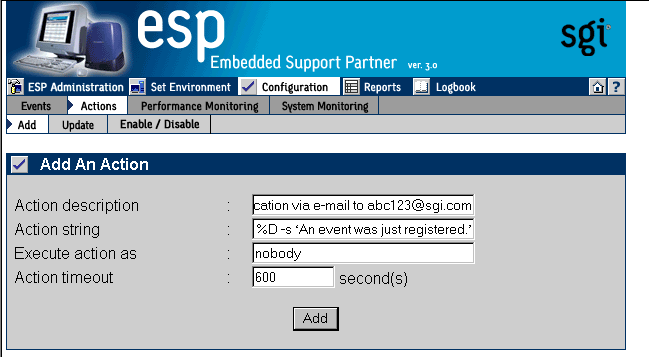
Update the parameters. (Table 8-1 lists the parameters for this example.)
Table 8-1. Example Action Parameters for Sending an E-mail Notification
Field
Setting
Action description
Send notification via e-mail to abc123@sgi.com
Action string
/usr/bin/espnotify -E abc123@sgi.com -m %D -s `An event was just registered.'
Execute action as
nobody
Action timeout
600
Figure 8-4 shows an interface page with the proper settings for this example.
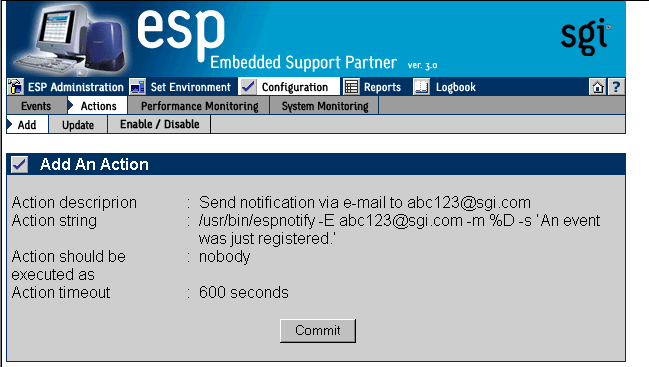
Click on the Add button. (Figure 8-5 shows the verification message for this example.)
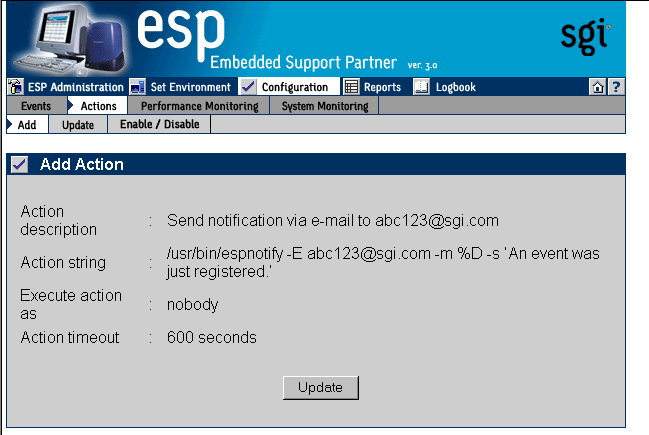
Click on the Commit button. (Figure 8-6 shows the confirmation message for this example.)


